
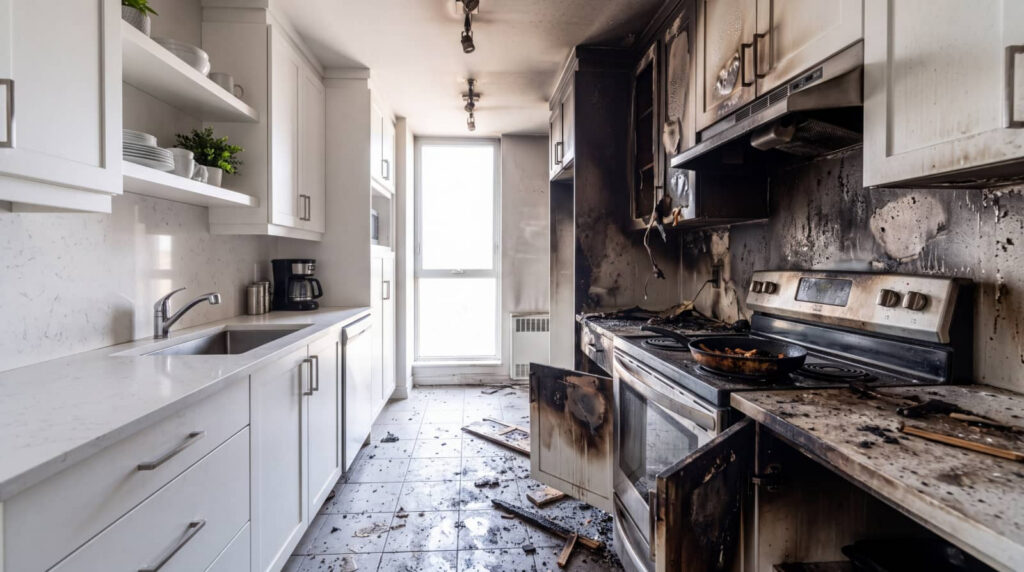
Before you start soot removal from walls and ceilings, you need to know what kind you’re dealing with, because oily residue and dry smoke dust respond differently. You’ll want the right sponge, a mild cleaner, and a method that limits smearing and surface wear. A small test spot can save a painted finish from permanent damage, but the real challenge starts when the soot won’t lift cleanly.
Key Takeaways
- Identify the soot type first; dry soot and oily soot need different cleaning approaches to avoid smearing or permanent staining.
- Wear gloves, eye protection, and a dust mask, and use a HEPA vacuum with a soft brush to remove loose soot safely.
- Test a hidden area with the least aggressive cleaner first, watching for color transfer, streaking, or surface damage.
- Clean walls and ceilings in small sections using light, straight passes, then rinse with a barely damp cloth to prevent streaks.
- Call a fire damage restoration professional if soot is heavy, odors persist, or hidden contamination in walls, ducts, or attic spaces is suspected.
What Kind of Soot Are You Cleaning?
Before you clean soot from walls and ceilings, you need to identify the type you’re dealing with, because not all soot behaves the same way.
You may see dry, powdery soot from fast-burning fires, or oily, sticky residue from low-oxygen combustion. Each type responds differently during soot removal from walls and ceilings, and using the wrong method can drive particles deeper into paint or drywall.
If the deposit smears easily, treat it as fragile and avoid pressure. If it feels greasy, assume it can stain quickly and needs careful handling.
You’re not alone in this step; you’re making the same careful distinction professionals use to protect the surface. When you assess the residue first, you reduce risk and improve your chances of a clean, even result.
Gather Supplies for Soot Removal From Walls and Ceilings
Start by assembling the right supplies so you can clean soot without grinding it into the surface. You’ll want dry-cleaning sponges, microfiber cloths, a HEPA vacuum with a soft brush attachment, a bucket, mild detergent, nitrile gloves, eye protection, and a dust mask.
Keep a ladder nearby if you’re working overhead, and use clean water in small amounts. Choose white or light-colored cloths so you can track residue transfer. Bag debris as you go to keep particles from circulating back onto your walls and ceilings.
Organize everything before you begin so you can work methodically with your household team or cleanup crew. When your tools are ready, you’ll reduce smearing, limit abrasion, and stay aligned with careful restoration practices.
Test a Small Spot First
Why test a small spot first? You need to verify that your cleaning method won’t smear soot, lift paint, or dull the finish.
Choose a hidden area, such as behind furniture or near a corner. Apply the least aggressive product you’d use on the full surface, then work lightly with a clean white cloth or sponge. Observe for color transfer, streaking, softening, or residue.
Wait a few minutes, because some damage appears after the area dries. If the paint changes, stop and switch methods before you expand the cleaning zone. This simple check protects the wall, limits surprises, and helps you work like a careful team member on the job.
When the test area stays stable, you can proceed with greater confidence and control.
Remove Loose Soot Dry
Use a dry cleaning approach first to lift loose soot before any wet cleaning begins. You can use a soft, dry sponge, microfiber cloth, or vacuum with a brush attachment to collect surface residue without pressing it deeper into the finish.
Work from the top down in light, straight passes, and replace or clean your tool often so you’re not redepositing particles. Keep your pressure minimal; if you rub, you’ll likely smear the soot and enlarge the stain.
Wear gloves and a mask so you stay protected while you work, and keep the room ventilated. Check your progress under good light, and stop if the surface starts to dull or shed material.
This careful first pass helps you protect the finish and stay in control together.
Wash Walls and Ceilings Carefully
Once the loose soot is gone, wash the walls and ceilings gently with a soot-safe cleaner mixed to the manufacturer’s directions.
Use a soft sponge or microfiber cloth, and work in small sections so you can control moisture and pressure. Wipe from the bottom up on walls to reduce streaking, then rinse with a clean, barely damp cloth before the surface dries.
Keep your strokes light and overlap them slightly so you don’t miss residue or grind particles into the finish. For ceilings, support the area below and use a stable ladder so you can reach without overextending.
Change your cleaning solution when it darkens. If you’re methodical here, you’ll protect the surface and stay aligned with the same careful standard your team expects.
Treat Stubborn Soot Stains
For stubborn soot stains, you should start with a dry cleaning sponge to lift surface residue without adding moisture.
If the mark remains, apply a gentle degreasing solution in a small test area first, since stronger cleaners can damage paint or spread soot.
Use repeated light applications rather than heavy scrubbing to reduce smearing and limit deeper staining.
Dry Cleaning Sponge Method
A dry cleaning sponge can lift stubborn soot from walls and ceilings without introducing moisture that could smear the residue or drive it deeper into the surface. You should use a clean, white sponge and press it lightly against the stain, then lift it straight off in short passes.
Work from the top down so loosened particles don’t fall onto cleaned areas. Rotate or trim the sponge as it loads, because a saturated face can redeposit soot. Don’t rub hard; excessive pressure can burnish paint or damage delicate finishes.
Test a small hidden spot first to confirm the surface can tolerate dry contact. If the residue remains after careful passes, stop and reassess before moving to any wetter method.
Gentle Degreasing Solutions
If the dry sponge lifts only part of the soot, you can move to a mild degreasing solution to break down the oily residue left behind.
Mix a few drops of pH-neutral dish soap in warm water, then test it on a hidden spot first. Keep the cloth barely damp, because excess liquid can drive soot into paint or drywall.
- Apply the solution to the stain, not the surface around it.
- Lift residue with a clean microfiber cloth using straight, light passes.
- Rinse the area with plain water on a fresh cloth, then blot dry.
You’re working with care, not force, so your wall stays intact and your cleanup feels controlled, professional, and safe.
Repeated Light Applications
When stubborn soot remains, repeat the cleaning in small, controlled passes rather than scrubbing harder. You’ll reduce the risk of driving carbon deeper into paint, drywall, or plaster.
Use a lightly damp sponge or microfiber cloth, then lift residue with straight, overlapping strokes. Rinse or switch cloths often so you’re not redepositing particles.
After each pass, let the surface dry and inspect it under angled light; spots that still read gray need another gentle cycle, not more pressure. If the finish starts to dull, pause and reassess the cleaner strength.
This method helps you work with the material, not against it, and keeps you in the careful, professional rhythm that protects both surface integrity and your shared standard for clean results.
Protect Painted and Textured Surfaces
Painted and textured surfaces need extra care because aggressive wiping can smear soot and drive it deeper into the finish. You protect them by using the lightest effective touch and by checking a small hidden area first, so you stay aligned with others who clean cautiously.
Use a soft, dry microfiber cloth to lift loose residue.
Support the wall with minimal pressure, following the texture instead of crossing it.
Work in short sections and replace soiled cloths often.
If paint feels fragile or a ceiling has heavy texture, slow your pace and keep your strokes controlled. You’re not trying to polish the surface; you’re trying to preserve it.
That careful approach helps you remove soot while keeping the finish intact and the room looking consistent.
Avoid Common Soot Cleaning Mistakes
Even careful work can go wrong if you use the wrong method on soot-covered surfaces. You should avoid wet scrubbing, which can drive carbon deeper into paint, drywall, and texture.
Don’t start with abrasive pads, because they can polish soot into pores and leave dull marks. You’ll get better control if you vacuum first with a soft brush attachment, then lift residue with a dry chemical sponge using light, straight passes.
Change to a clean face often so you don’t redeposit grime. Skip strong cleaners at the outset; they can spread staining and create streaks.
Work from top to bottom, and test one small area before you continue. With steady technique, you can protect the finish and keep your space looking cared for.
When to Call a Soot Cleanup Pro
If you see severe smoke damage, you should call a soot cleanup pro because surface cleaning may not reach all affected areas.
You may also need professional help when soot has entered hidden structural spaces, such as wall cavities or ceiling voids.
If odors persist after cleaning, the contamination likely remains and needs specialized removal.
Severe Smoke Damage
When soot covers large areas, has penetrated porous wall or ceiling materials, or keeps reappearing after light cleaning, you should bring in a soot cleanup professional.
You’ll protect your space and avoid pushing contamination deeper. Severe smoke damage often needs controlled methods, not spot scrubbing.
You see heavy, uniform blackening across rooms.
Odor lingers after basic wiping and airing out.
Cleaning tests show smearing, staining, or residue transfer.
A trained pro can assess the extent, choose the right detergents, and reduce the chance of permanent discoloration.
You don’t have to guess alone; calling in help means you’re acting with caution and joining others who handle damage the right way.
Hidden Structural Soot
Soot can also hide in wall cavities, attic spaces, and other structural voids, where surface cleaning won’t reach the contamination. You may see only light staining, but hidden deposits can keep shedding fine particles into your rooms.
If you notice warping, soft drywall, exposed insulation, or soot around vents, you shouldn’t keep scrubbing the surface alone. That can drive residue deeper and spread contamination.
A cleanup pro can open limited access points, inspect framing, ducts, and insulation, and use containment, HEPA filtration, and controlled removal methods. You’ll get a more accurate scope and a safer plan for your home.
If damage seems beyond paintable surfaces, call a specialist early so your space can recover with less risk and fewer surprises.
Persistent Odors After Cleaning
Even after visible residue is gone, lingering smoke odors can signal soot trapped in porous materials, cavities, or HVAC components.
You can clean the surface, yet odor molecules may keep migrating out, especially after temperature or humidity changes. If you’re checking your space, watch for these signs:
- Odor returns after ventilation.
- Odor intensifies near vents, outlets, or baseboards.
- Wiping the wall leaves no residue, but the smell persists.
At that point, you may need a soot cleanup pro. They can test hidden contamination, inspect ducts, and apply deodorization methods that match the material.
Don’t keep sealing over the issue; you could trap contaminants and worsen indoor air quality. You deserve a clean, safe room that feels like home again, not one that just looks clean.
Frequently Asked Questions
How Long Should I Wait Before Cleaning Soot After a Fire?
You shouldn’t wait; clean soot as soon as it’s safe, ideally within 24–48 hours. If you delay, residues bond and stain more deeply. If conditions feel unsafe, you’ll want professionals to handle it.
Can Soot Damage Drywall if Left Uncleaned?
Yes—soot can damage drywall if you leave it alone; it’s the clingy guest that stains, absorbs odor, and can etch surfaces. You should clean it promptly, because moisture and time make contamination worse.
Should HVAC Vents Be Covered During Soot Cleanup?
Yes, you should cover HVAC vents during cleanup so you don’t circulate soot or spread residue. Seal registers tightly, shut the system off, and use proper filtration. That helps protect your space and keeps results cleaner.
Is It Safe to Use a Vacuum on Soot-Covered Ceilings?
No, you shouldn’t use a standard vacuum on soot-covered ceilings; you’ll spread fine particles and damage finishes. You can use a HEPA vacuum with a soft brush attachment only after testing a small area carefully.
How Do I Know if Soot Has Spread Into Hidden Areas?
You’ll notice soot spread in hidden areas when you smell smoke in closed rooms, find black dust in vents, or see discoloration behind fixtures. You should inspect cavities, attic spaces, and HVAC filters carefully.
Conclusion
Like a careful lantern-bearer passing through a smoke-blackened hall, you can restore walls and ceilings without stirring more damage. You’ll start dry, test a hidden corner, and move in small, controlled sections, changing your tools before they spread the soot’s shadow. Treat each surface as if it’s fragile parchment, not stone. If stains still cling or the finish looks at risk, it’s safer to bring in a soot cleanup pro.