
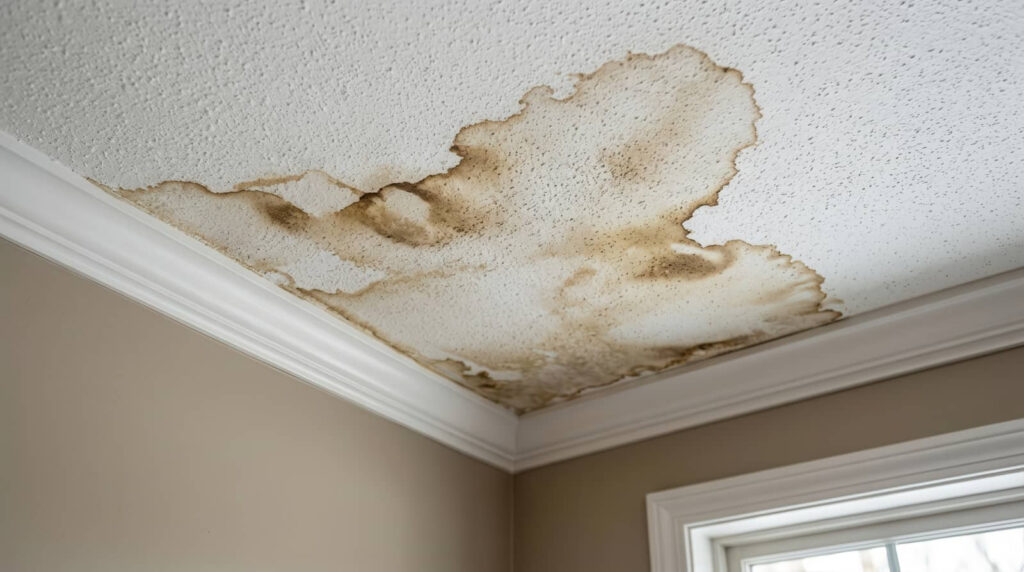
When a roof leak reaches your ceiling or walls, you need to act fast because water spreads beyond the visible stain and weakens materials from the inside out. You start by stopping the source, then you assess what’s wet, what’s hidden, and what can still be saved. The restoration process relies on moisture checks, controlled drying, and careful removal of damaged materials, but the real question is how far the water has already traveled.
Key Takeaways
- Stop the leak quickly, protect belongings, and document damage with photos.
- Roof leak water often spreads hidden through ceilings, walls, insulation, and framing.
- Use moisture meters and thermal imaging to find hidden damp areas accurately.
- Dry affected materials with air movers and dehumidifiers before making repairs.
- Repair the roof source, restore damaged materials, and inspect regularly to prevent future leaks.
Stop the Roof Leak and Protect the Area
First, stop the leak at the source if you can do so safely. Then protect the affected area to limit further water intrusion. You should place a tarp or temporary patch over the entry point and secure it against wind.
Inside, move furniture, electronics, and valuables away from the wet zone, and set containers under active drips. If water damage from roof leaks has started, shut off nearby power only when you can reach the breaker without risk.
Use towels or plastic sheeting to shield flooring and keep traffic out of the area. Document what you see with photos, because clear records help your restoration team work faster.
When you act quickly and stay organized, you’ll help your home and your household feel more secure.
Why Roof Leaks Damage Ceilings and Walls
When you have a roof leak, water often migrates across ceiling materials before you see visible staining or sagging.
You’ll usually find ceiling moisture spreading along framing members, drywall seams, and insulation contact points, while wall saturation follows gravity, insulation voids, and hidden cavities.
Ceiling Moisture Spread
Roof leaks rarely stay confined to the entry point, because water can travel along framing members, seep into ceiling cavities, and spread into adjacent walls and insulation.
You may only see a stain, but moisture often moves laterally above the drywall before it drips. In your home, gravity and capillary action let wet materials pull water farther than you expect, especially around seams, fasteners, and light fixtures.
As the ceiling assembly absorbs moisture, gypsum softens, paint blisters, and joints lose strength.
You should document the area, then have a restoration team open small inspection points, measure hidden moisture, and map the wet zone.
Quick drying limits secondary damage and helps your space recover cleanly, so you can get back to feeling safe and settled fast.
Wall Saturation Patterns
As water migrates beyond the roof entry point, it often saturates wall cavities unevenly, following studs, plates, and insulation as pathways of least resistance.
You’ll usually see upper drywall staining first, then damp baseboards, swollen trim, and soft spots around outlets or corners.
Moisture can wick downward by capillary action, while gravity pulls it into the lowest framing members.
You should check both sides of the wall, because hidden insulation can hold water long after the surface feels dry.
Professionals use moisture meters and thermal imaging to map these patterns, then open the wall only where needed.
Once exposed, they remove wet materials, dry the cavity, and confirm safe moisture levels.
When you understand this pattern, you’re better prepared to join the restoration process confidently.
Find Hidden Moisture in Ceilings and Walls
You should check ceilings and walls with a moisture meter to identify damp areas that aren’t visible on the surface.
Use thermal imaging scans to spot temperature differences that can indicate trapped water behind finishes.
If readings stay high, inspect wall cavities to confirm the extent of hidden moisture and guide drying efforts.
Moisture Meter Checks
A moisture meter helps pros detect hidden water in ceilings and walls after a roof leak. You place the pins or sensor on drywall, plaster, trim, and framing to measure moisture content.
Start where staining is visible, then test outward in a grid so you can map the wet area. Compare readings with dry sections in the same room; that baseline tells you what normal looks like.
You’ll often recheck after initial drying to confirm the materials are improving. If readings stay high, you know moisture remains behind the surface and you need more targeted drying or removal.
This step keeps your restoration crew aligned, speeds decisions, and helps protect your home from lingering damage, mold growth, and avoidable repairs.
Thermal Imaging Scans
Thermal imaging scans help you find hidden moisture that roof leaks leave behind in ceilings and walls by revealing temperature differences on the surface.
You’ll use an infrared camera to map cool, damp areas beside drier material, then mark each anomaly for follow-up testing. Move slowly, keep the lens steady, and scan after the building has had enough time to show temperature contrast.
You can compare suspect zones with dry sections to narrow the affected area without opening finishes. This step helps you and your restoration team work as one, because everyone sees the same evidence.
After you identify likely moisture pockets, you’ll confirm them with direct measurement and plan drying from a solid, shared starting point.
Wall Cavity Inspection
After thermal imaging flags suspect areas, inspect wall and ceiling cavities to verify where moisture has traveled behind the surface. You’ll open small access points, remove trim or select drywall sections, and use a moisture meter, borescope, and flashlight to confirm hidden wetting.
Check insulation, framing, sheathing, and fasteners for saturation, staining, rust, or microbial growth. If readings stay elevated, you should widen the inspection until you’ve mapped the full affected area. This step helps you and your crew avoid missed pockets that can keep damaging finishes and indoor air.
Dry Water-Damaged Materials Fast
Dry water-damaged materials fast to limit swelling, staining, mold growth, and structural deterioration. You should begin with aggressive airflow, dehumidification, and temperature control so moisture leaves the building envelope quickly.
Position air movers to sweep across wet surfaces, not directly at them, and keep return pathways open for humid air to escape. Run a dehumidifier sized for the affected area and empty or drain it continuously.
If you can, remove standing water first, then monitor moisture with a meter until readings trend toward normal. Check framing, subfloors, and finishes twice daily, because hidden pockets can slow drying.
Stay consistent, document progress, and work methodically with the restoration team so everyone stays aligned and the space gets back to safe, stable conditions.
Remove Damaged Insulation and Drywall
Strip out any insulation and drywall that stayed wet long enough to lose integrity. You’ll protect the structure and stop trapped moisture from feeding mold or hidden decay.
Cut back to clean, dry edges, then remove only the affected sections so you can keep the repair zone tight and manageable. Bag debris as you work, and seal it before you carry it out to avoid spreading dust and spores.
If insulation is compressed, matted, or contaminated, discard it rather than trying to salvage it. Keep the cavity open for airflow and inspection, and check framing for soft spots or staining.
When you work methodically, you stay in control and support a safer, cleaner restoration process for everyone involved.
Restore Ceilings, Walls, and Paint
Once the cavity is clean and dry, you can rebuild the finish layers on ceilings and walls. You’ll patch joints, tape seams, and apply compound in thin coats, letting each layer dry before you sand it smooth.
Match texture with the existing surface so the repair blends in. Then you’ll prime the area to seal repairs and create an even base for paint. Use quality ceiling or wall paint, and roll it on in light passes for uniform coverage.
- Refasten loose drywall securely
- Feather patched edges into the surrounding surface
- Inspect for remaining stains or ridges
- Apply matching finish coats carefully
Prevent Future Roof Leak Water Damage
To prevent future roof leak water damage, you’ll need to identify and correct the source of intrusion before interior repairs fail again.
Inspect flashing, shingles, vents, skylights, and roof penetrations after storms and at least twice a year. Replace cracked sealant, loose fasteners, and damaged shingles immediately.
Clean gutters and downspouts so water drains away from the structure, and trim branches that scrape roofing.
Check your attic for damp insulation, staining, or daylight at joints, then ventilate the space to reduce condensation.
If you notice recurring leaks, schedule a licensed roofer to test seams and underlayment.
Keep records of repairs, photos, and inspection dates so you can track patterns and stay ahead of trouble together.
Frequently Asked Questions
How Long Does Roof Leak Restoration Usually Take?
Usually, you’ll need 1 to 3 days for drying and several more days for repairs, depending on leak size and damage. You’ll get faster results if you act quickly and coordinate inspections, extraction, and replacement.
Will My Insurance Cover Roof Leak Water Damage?
Your insurance may cover it if the leak came from a sudden, accidental event, but not from neglect or wear. You should review your policy, document damage, and file promptly so you’re supported quickly.
Can I Stay in My Home During Restoration?
Yes, you can often stay home, but not always. Your technician’ll assess safety, moisture, and drying equipment. If ceilings sag, mold spreads, or utilities’re affected, you should relocate until it’s safe.
How Much Does Professional Roof Leak Cleanup Cost?
Professional roof leak cleanup usually costs you $500 to $5,000, depending on damage size, materials, and drying needs. You’ll pay more if mold forms or structural repairs are needed, but quick action lowers costs.
When Should I Call a Water Damage Restoration Company?
You should call a water damage restoration company within 24 hours; mold can begin growing then. You’ll protect your space, locate hidden moisture, dry materials, and restore ceilings, walls, and insulation quickly.
Recap
When you stop the leak, you’re really closing the door on hidden decay. Drying, removal, and repairs work like lanterns in a dark attic, revealing what water tried to hide. By clearing damaged materials, restoring surfaces, and sealing weak points, you don’t just fix today’s stain—you protect your home’s structure for tomorrow. Stay alert, inspect regularly, and treat every drip like a warning sign before it grows into costly damage.